
Disclosure: I may earn affiliate revenue or commissions if you purchase products from links on my website.
Promotion: I wrote Framed: A Villain's Perspective on Social Media. It's an outgrowth of everything visitors have liked about this blog since 2016. It's now on sale for $3.99!
On a Christmas morning many years ago, I received a box of Yu-Gi-Oh Elemental Energy packs. I constructed a really cool Dark World deck from the cards I pulled. But I don’t think I ever dueled anyone with those cards, as the focus of my friends and I suddenly shifted to videogames, and my cards spent more than a decade locked away.
Every now and again, I’ve played YGO online. Partially to relive the glory days of beating all of my neighborhood friends. Partially because I regret never learning how to properly play the game when I still had neighborhood friends to play with. It’s fun, approachable, and has just the right amount of nostalgia. By maintaining a ban list, Konami, the creators of Yu-Gi-Oh, are able to exert control over the balance of the game and create significantly different metagames without having to release new cards. I find it to be intellectually stimulating.
Suffice to say there have been a lot of new rules and card types for me to pick up. Comparing the speed of the game and the chains that get executed from when I first started playing to now is just insane. Anyway, I’ve fared decently, and have really enjoyed those moments where I’ve won by believing in the heart of the cards.
One deck that has been incredibly enjoyable to play is my Dark World deck. All these years later, using many of the cards that I pulled from the packs when I was a kid is still viable. Is it a meta-deck–meaning, is it among the most successful decks in competitive tournament play–I don’t know. But it’s fun as hell to play, and it’s certainly an OTK deck. OTK means One Turn Kill. And playing my Dark World deck, I’ve seen unbelievable field advantages over both bots and other players. In this article, I’ll talk about my deck build and some of the strategies I often employ.
Deck Summary
The deck is a fairly typical Dark World deck with four Danger! monsters included. Ten monsters potentially requiring tributes or other cards in your hand is a lot. When I’m not drawing well, it’s awful. When I’m drawing well, it’s easy to overpower other decks. Most controversial is probably my inclusion of a third Grapha, a third Lucent, and a Dangerous Machine Type-6. Still, it’s really fun to play and the combinations of winning strategies are endless.
Deck List
Monsters
1 x Danger! Bigfoot!
2 x Danger! Chupacabra
1 x Danger! Nessie!
3 x Grapha, Dragon of Dark World
3 x Lucent, Netherlord of Dark World
2 x Goldd, Wu-Lord of Dark World
3 x Snoww, Unlight of Dark World
2 x Beiige, Vanguard of Dark World
1 x Trance Archfiend
3 x Broww, Huntsman of Dark World
1 x Morphing Jar
2 x Ceruli, Guru of Dark World
Spells
1 x Galaxy Cyclone
3 x Dragged Down into the Grave
1 x Card Destruction
1 x Dangerous Machine Type-6
3 x Dark World Dealing
1 x Monster Reborn
1 x Mystical Space Typhoon
1 x Twin Twisters
3 x the Gate of Dark World
Traps
1 x Eradicator Epidemic Virus
Cards I Like
Trance Archfiend
Getting this card in an early draw often means I will win the duel. Trance Archfiend allows you to discard a card from your hand for it to gain 500 attack. This can initialize a lot of exciting strategies within the Dark World deck. Since it’s a fiend monster, 2300 attack with this effect activated and the Gates of Dark World in play can hold its own. It has the fringe benefit of being able to recover one of your banished dark monsters, so it pairs incredibly well with Gates of Dark World, and makes that effect preferable to Dark World Dealings.
Morphing Jar
The jar cards can often shift the tide of the duel dramatically. That’s why they have been limited or banned since release. Morphing jar is, in my opinion, the most powerful card in the deck. When you flip it, you discard your entire hand and then draw 5 cards. Whether your hand is stuffed, or whether you’re out of cards to draw, it’s a shining example of a game-changer.
Flip effects are out of vogue in the current meta, and it’s easy to remove a morphing jar. Further, it’s a predictable flip monster in a Dark World deck. Your opponent could easily neutralize it with an effect or purposefully play most of his hand before attacking it.
Another downside of Morphing Jar is that it’s a rock type and earth type. It doesn’t receive any notable buffs and there’s no way to recycle it in this deck.
Card Destruction
Even as a twelve-year-old, I knew that Card Destruction belonged in this deck. It’s a classic card that I find uses for whether I have one or whether I have five cards in my hand. Used cunningly when an opponent plays a mid-game Maxx “C,” I have actually managed to exhaust my opponent’s deck on one occasion. The main benefit is being able to deploy a hand’s worth of Dark World cards, but it can be easy to overlook how much it can disrupt an opponent’s gameplan.
Galaxy Cyclone
I am probably biased based on spending a lot of time running this deck against the Dueling Nexus AI, but Galaxy Cyclone is a great card. You can take down an annoying set trap card and then take down one of those powerful continuous spell or field spell cards the next turn. Sometimes, in desperate situations, I discard this card to increase my draw power and still use its secondary effect the next turn.
For me, it’s more versatile than running two MSTs.
Dangerous Machine Type-6
This is a silly chance card based on the roll of a die. 1: Discard 1; 2: Opponent discards 1; 3: Draw 1; 4: Opponent draws 1; 5: Destroy 1 opponent’s monster; 6: Destroy this card. Since a self-discard is almost always a positive utility play, this card becomes somewhat viable. The only negative effect becomes allowing your opponent to draw 1, or having the card off itself with a 6 before it does anything. If I played competitively, I’d remove this card, as it usually takes too long to do anything useful.
Danger! Bigfoot!
The Danger! cards are powerful and compliment the Dark World deck well. Danger! Bigfoot!, with 3000 attack, a simple special summon condition, and the effect of destroying one of your opponent’s face-up cards if you happen to discard it, is just absurd. It shouldn’t be an unlimited card, but it is. I often experiment with running additional copies and the results are promising. It makes summoning the rank-8 XYZ monsters simple and makes Eradicator Epidemic Virus more potent.
Eradicator Epidemic Virus
It’s likely that the argument against this card in the main deck is that… well… it is a side deck card. I find it generally applicable and it’s fun to eradicate my opponent’s strategies.
Extra Deck
I cobbled together an extra deck that works well, but I’m not sure how meta it is. One thing you’ll notice is that I have a lot of rank 4 XYZ monsters but I skipped out on including a 3rd Beiige or Danger! Chupacabra!. I think keeping a low number of level 4 monsters ultimately hurts the deck, and should probably be tweaked.
Number 38: Hope Harbinger Dragon Titanic Galaxy
Number 38 is a utility XYZ monster that I bring out during Main Phase 2. It’s often a good choice when two Lucents couldn’t finish the job, or I’ve encountered some type of stalling strategy. At 3000 attack, it’s a beefy monster, and it’s great for protecting your weaker utility and XYZ monsters, since you can redirect attacks to it and gain a massive buff if another one of your XYZ monsters is destroyed.
Hieratic Sun Dragon Overlord of Heliopolis
This card is fairly easy to special summon and the effect often opens the door to an OTK. You can tribute monsters and destroy that many cards on the field. If the effect doesn’t get countered, this is one of the most useful power plays you can enact.
Photon Strike Bounzer
A useful counter card that prevents a lot of chains from getting anywhere. When I’m not familiar with my opponent’s deck, I’ll get this guy out.
Gauntlet Launcher
This is the miniature version of Hieratic Sun Dragon. You can detach one material to destroy one monster. I don’t feel this card is particularly useful with the prevalence of protections in today’s meta, but it’s still worth running.
Evilswarm Ouroboros
Returning an opponent’s card to his hand can pave the way to an OTK. Unfortunately, needing to sacrifice three level-4 monsters to bring Ouroboros onto the field is rarely worth it. I used to play this card often in a zombie deck, but it’s probably time to replace it.
Number 39: Utopia
Utopia can take down a fair number of other monsters from the extra deck and also provide a useful layer of defense when you need to draw 2-3 more times but are getting annihilated. It’s always a defensive play for me but never preemptively so.
Tornado Dragon
This is a classic XYZ to use against stall decks or to help guarantee the OTK. 2100 ATK also holds its own against a lot of cards that might be played in the early game, especially if your opponent gets a bad initial draw.
Number 101: Silent Honor ARK
This is a card that makes your opponent quit. Simply, you target one of their special-summoned boss monsters and equip it to Silent Honor ARK rather than destroying it–strafing common graveyard effects. Like Utopia, it’s also a useful wall if the tide of battle turns. You can keep it on the field by detaching a material each time it would be destroyed.
Number 60: Dugares the Timeless
This is an extremely desperate card but I love playing it. When you’re playing against a beatstick deck, doubling one of your monsters’ attack is absurd and can overcome any foe. By the same token, drawing two cards and discarding one while skipping your next draw phase is a risk I’m often willing to take. +2 with a discard almost always benefits a Dark World deck, and it can reenergize the hand in a scenario where you’re fishing for a homerun play.
Evilswarm Nightmare
If you know you’re going to get steamrolled on your next turn, Nightmare is a popular choice to bring out during Main Phase 2. It can transform glass-cannon boss monsters into sitting ducks and neutralize the effects of all others. Great for breaking up chains.
Five-Headed Link Dragon
With a Dark World deck, you can easily go from an empty field to five full monster zones in the aftermath of one excellent Card Destruction or Morphing Jar play. Getting the Five-Headed Link Dragon on the field in the mid-game (with at least 15 cards in the graveyard allowing you to keep it on the field for three turns) often means victory. It can overcome any beatstick monster. It has 5000 attack, can’t be targeted by other card’s effects, and can’t be destroyed by most monster attributes. I love playing this card, but there’s a huge opportunity cost involved with bringing it out.
Borrelsword Dragon
I find this card to be overused. If you need to defeat a boss monster and then go for the kill, it’s viable. But it’s a one-dimensional strategy that is not always the best choice when you have to sacrifice four monsters.
Saryuja Skull Dread
This is a versatile card, but doesn’t do a whole lot of favors for the deck. Getting it out with two monsters provides an effect that is only marginally useful. Getting it out with 3+ links is awesome, but, in this deck, special summon usually means discarding. So it’s usually carte blanche for special summoning to begin with, but when you combine these effects with 4+ links, that’s when this becomes a killer card. It can turn the tide of the game more rapidly than any other link monster in my extra deck, as gaining a +1 hand advantage while getting to potentially swap 3 existing cards that I don’t like provides me with a lot of utility.
Knightmare Gryphon
Useful to breathe new life into a backfield. I rarely use it.
Knightmare Phoenix
Super easy link-2 monster to bring out. I rarely play it, and usually only against stall decks. This said, the optional discard does benefit the average Dark World deck, but I’m hardly ever struggling to find opportunities to discard.
How to OTK
This deck’s engine depends on discarding cards. It is easy to discard cards, but there’s a big difference between getting two monsters on the field with about 5400 attack versus getting an 8000+ attack force out in one turn. This deck, without careful XYZ summons, has a weak defense against most meta decks, so in many situations it is critical to chance the OTK over waiting another turn.
I will always play The Gates of Dark World if I draw it. Then, I prioritize playing Dark World Dealings if I have it. I’ll almost always elect to toss Snoww at the beginning of the match because it allows for many different strategies. I’ll sometimes use Snoww’s effect to pull another Dark World Dealings, but if my hand already contains a discard card, I’ll choose Ceruli, which multiplies the effect of every Dark World monster except for Beiige.
As my hand widdles down and my field begins to fill up, I’ll set any remaining spell cards and will play whatever Danger! cards I have. The goal is to never have to normal summon a card aside from Trance Archfiend, but I will occasionally drop Snoww onto the field to arrange a utility XYZ summon, even sometimes the draw-2-discard-1 effect of Number 60.
Another thing that is important to prioritize is getting Grapha to the graveyard. You can special summon it from the graveyard by returning one Darkworld monster to your hand, thus allowing you a rare opportunity to reload your hand in a deck that often leaves you with a meager hand count.
I save Dragged Down to the Grave until the bitter end of the turn. This deck is exciting to draw from, and even fairly bleak situations have been turned around by a strategy that began with Dragged Down to the Grave. This goes without saying, but if you only have one card in your hand, your opponent will be forced to select that card for you to discard.
Once your field is stacked with enough attack power, then comes the decision–how do you best guarantee an OTK? I most often use Hieretic Sun Dragon to clear the entire field, but some combination of Tornado Dragon and Gauntlet Launcher works too. Once the field is clear, there’s always the risk of some type of effect your opponent can play from his hand, but there’s not much this deck can do to counter it. When it comes to building up the raw power, getting out a Grapha and Bigfoot alongside whatever card you used to clear the field is usually enough. If you don’t feel like clearing the field and want to win on a single attack, I have successfully used Number 60’s effect to double the attack of Link God Dragon to 10,000, but that tends to be excessive.
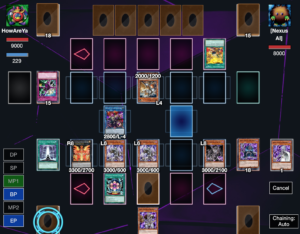
Many times, though, the OTK is overwhelming and doesn’t require all that much thought. Below is a recent victory. I hope this post has helped you enjoy the game as much as I have!